Painting render isn’t the same as painting timber or fibre-cement. Get it wrong and the paint peels, the patch shows through and you’re back painting it again in two years. Get it right and you have a 10-year wall.
1. Wait for the cure
Fresh cement-based render needs 21–28 days to cure before it’s ready for paint. The chemistry of cement curing pushes alkalinity to the surface and that alkali will burn through any paint applied too early. Acrylic renders are different — they can be top-coated within 24 hours.
If you’re unsure which you have, do the rain test: fresh cement render still cures wet, looks darker after rain and lighter as it dries unevenly. Once it’s evenly coloured all over after a wet day, it’s usually ready.
2. Wash, then wash again
Render walls accumulate dust, mould spores, salt (if you’re coastal) and chalk from the previous paint. A pressure-wash from low pressure with a fan tip is mandatory. We follow with a sugar-soap wash on stubborn areas and a mould-killing solution where there’s any sign of green or black bloom.
3. Prime the right primer
Three different primer choices depending on what you’re going over:
- New cement render: alkali-resistant primer (e.g. Dulux 1-Step Acrylic Primer Sealer Undercoat).
- Old chalking paint: a bonding primer that locks down the chalking layer (e.g. Dulux Stainblock or Wattyl Sealabind).
- Salt-affected walls: a salt-neutralising primer first to stop the salt cycling through the new paint.
Skipping the primer is the single biggest reason render paint jobs fail in 18 months instead of 10 years.
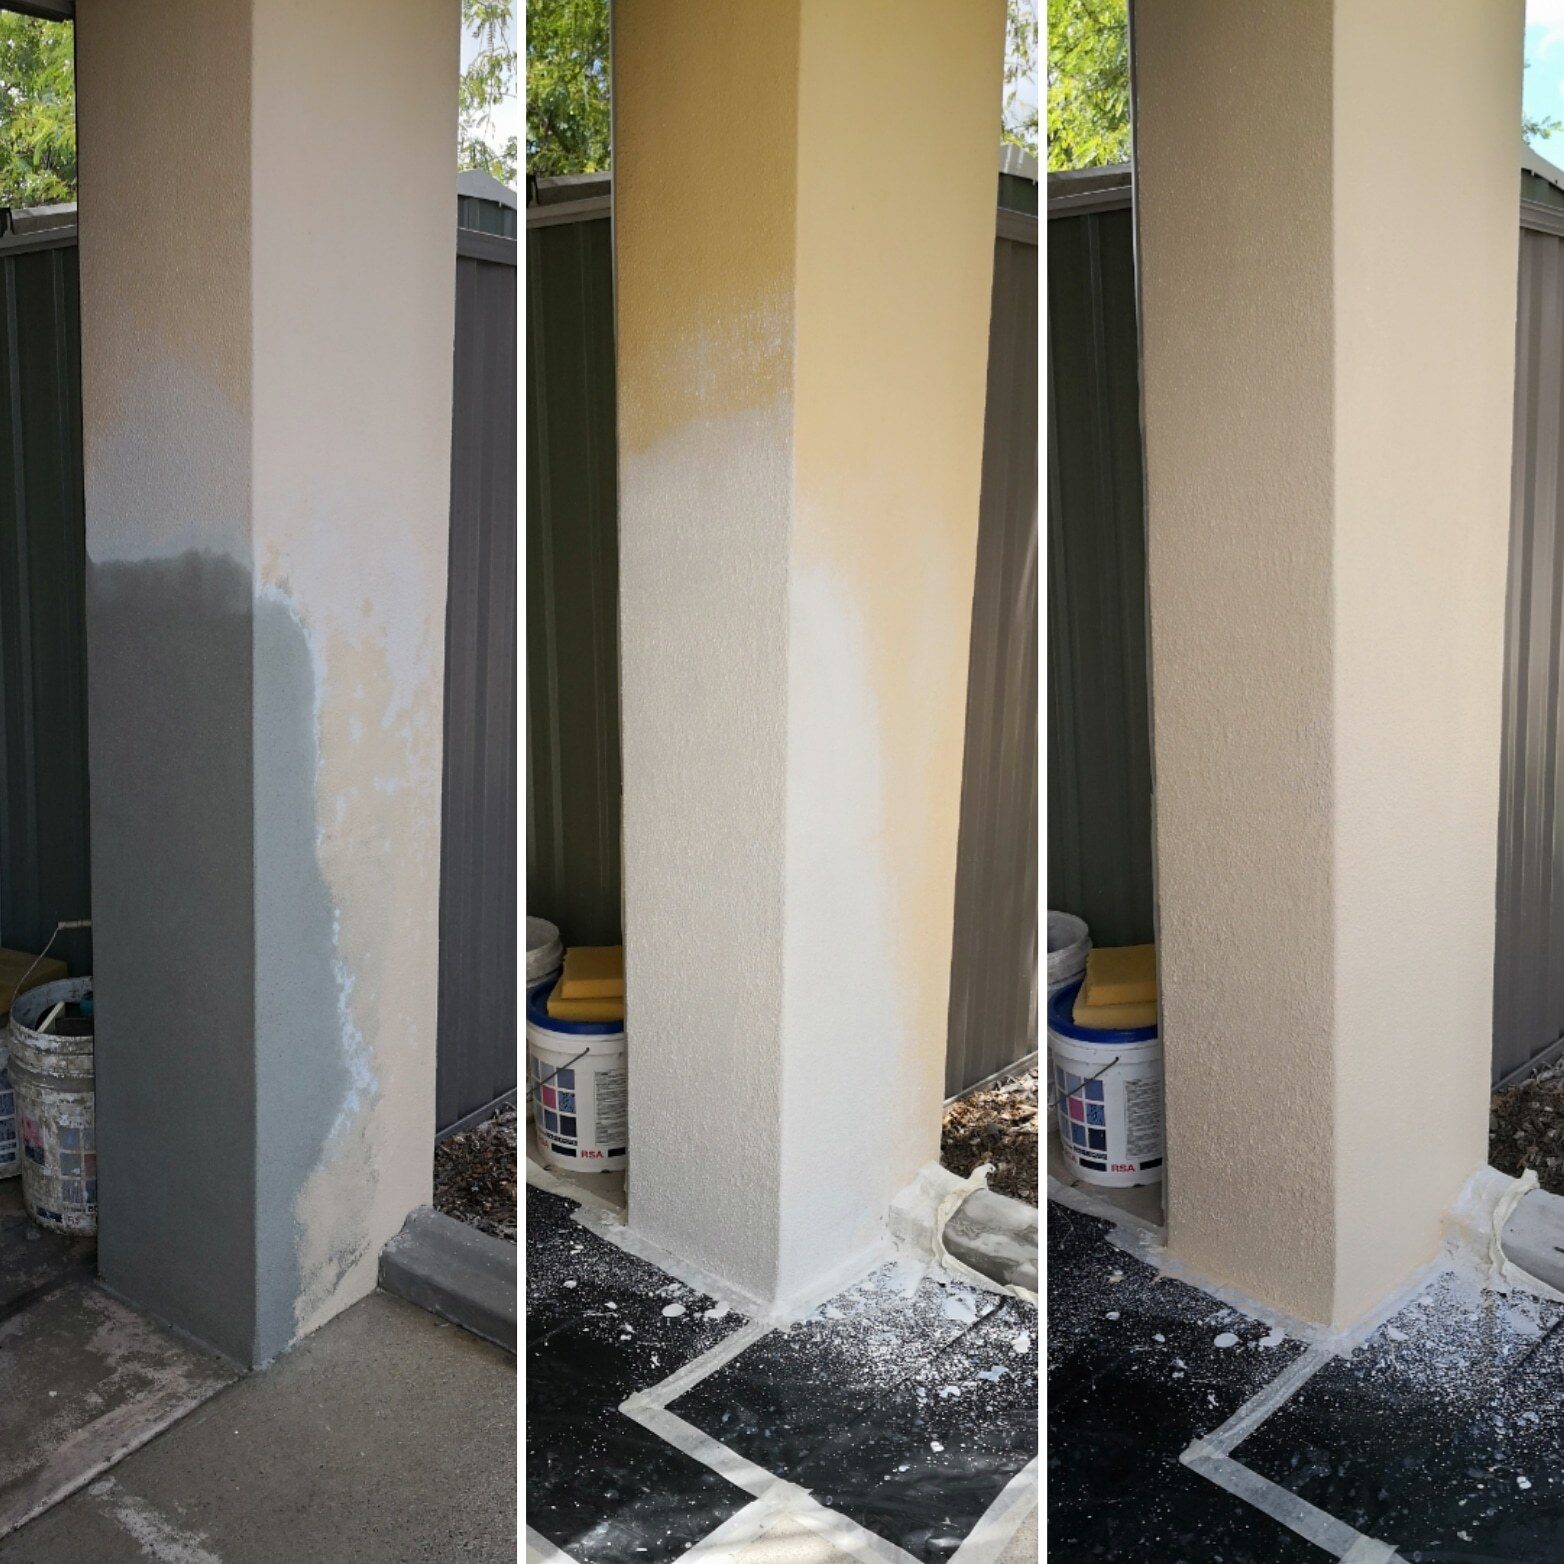
4. Two coats of the right top-coat
For external Gold Coast walls there’s really only one shortlist: Dulux Weathershield, Wattyl Solagard, Taubmans Endure, Haymes Solashield. All carry a 10-year warranty and all hold colour well. We default to Dulux Weathershield — it’s what most insurance and warranty work specifies.
Two coats minimum, applied at the manufacturer’s spread rate (don’t skinny it). On dark colours and on textured render you may need three coats for full opacity.
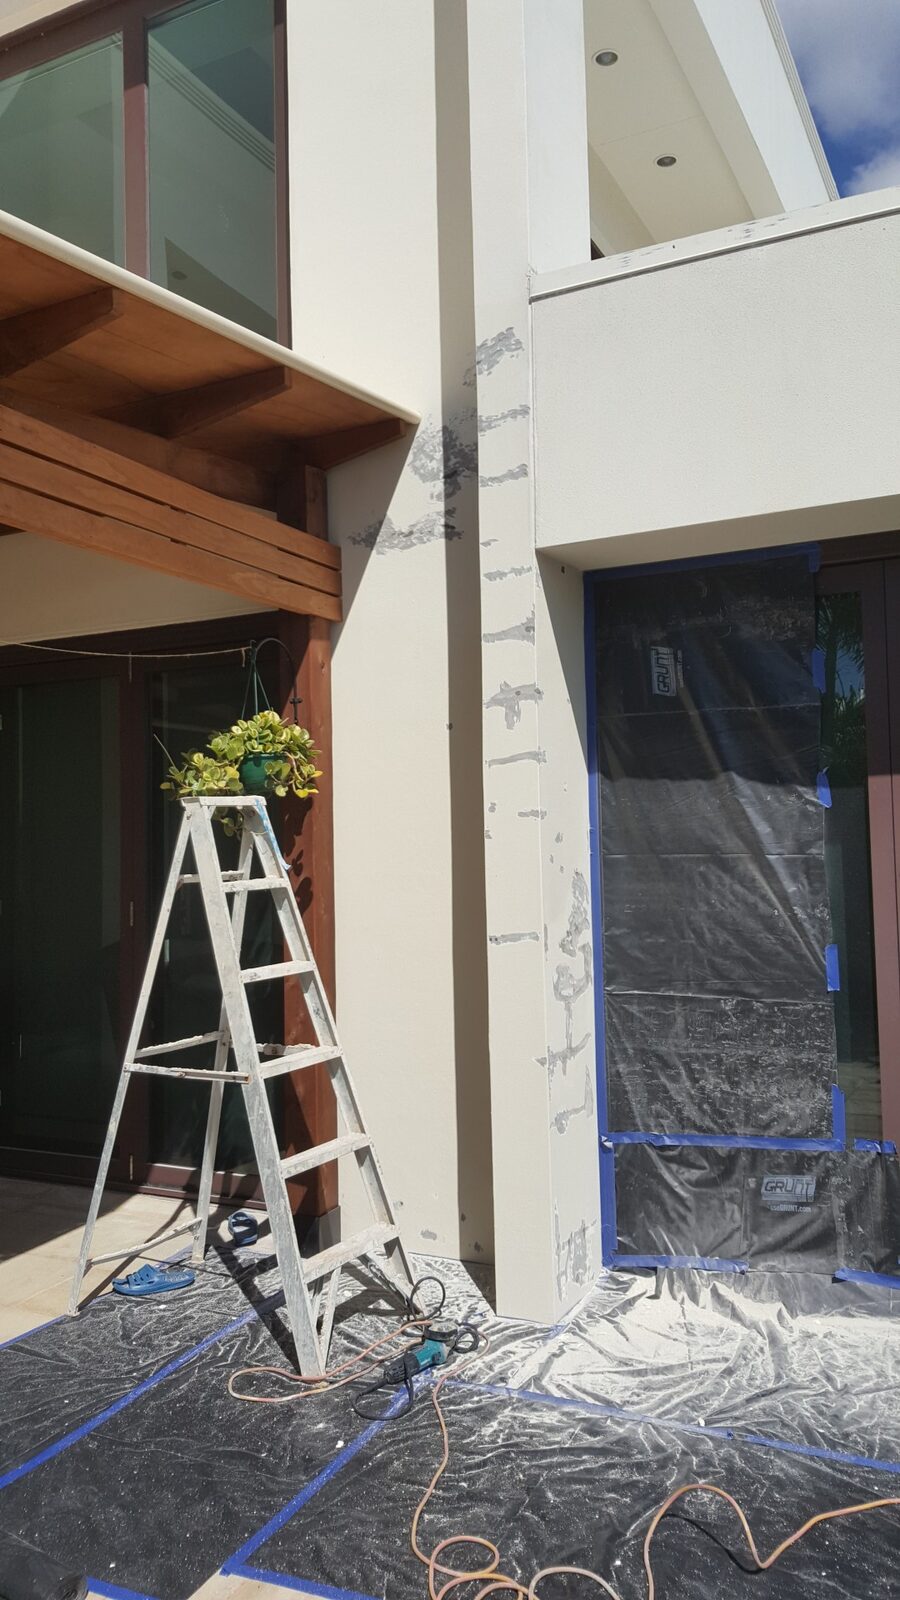
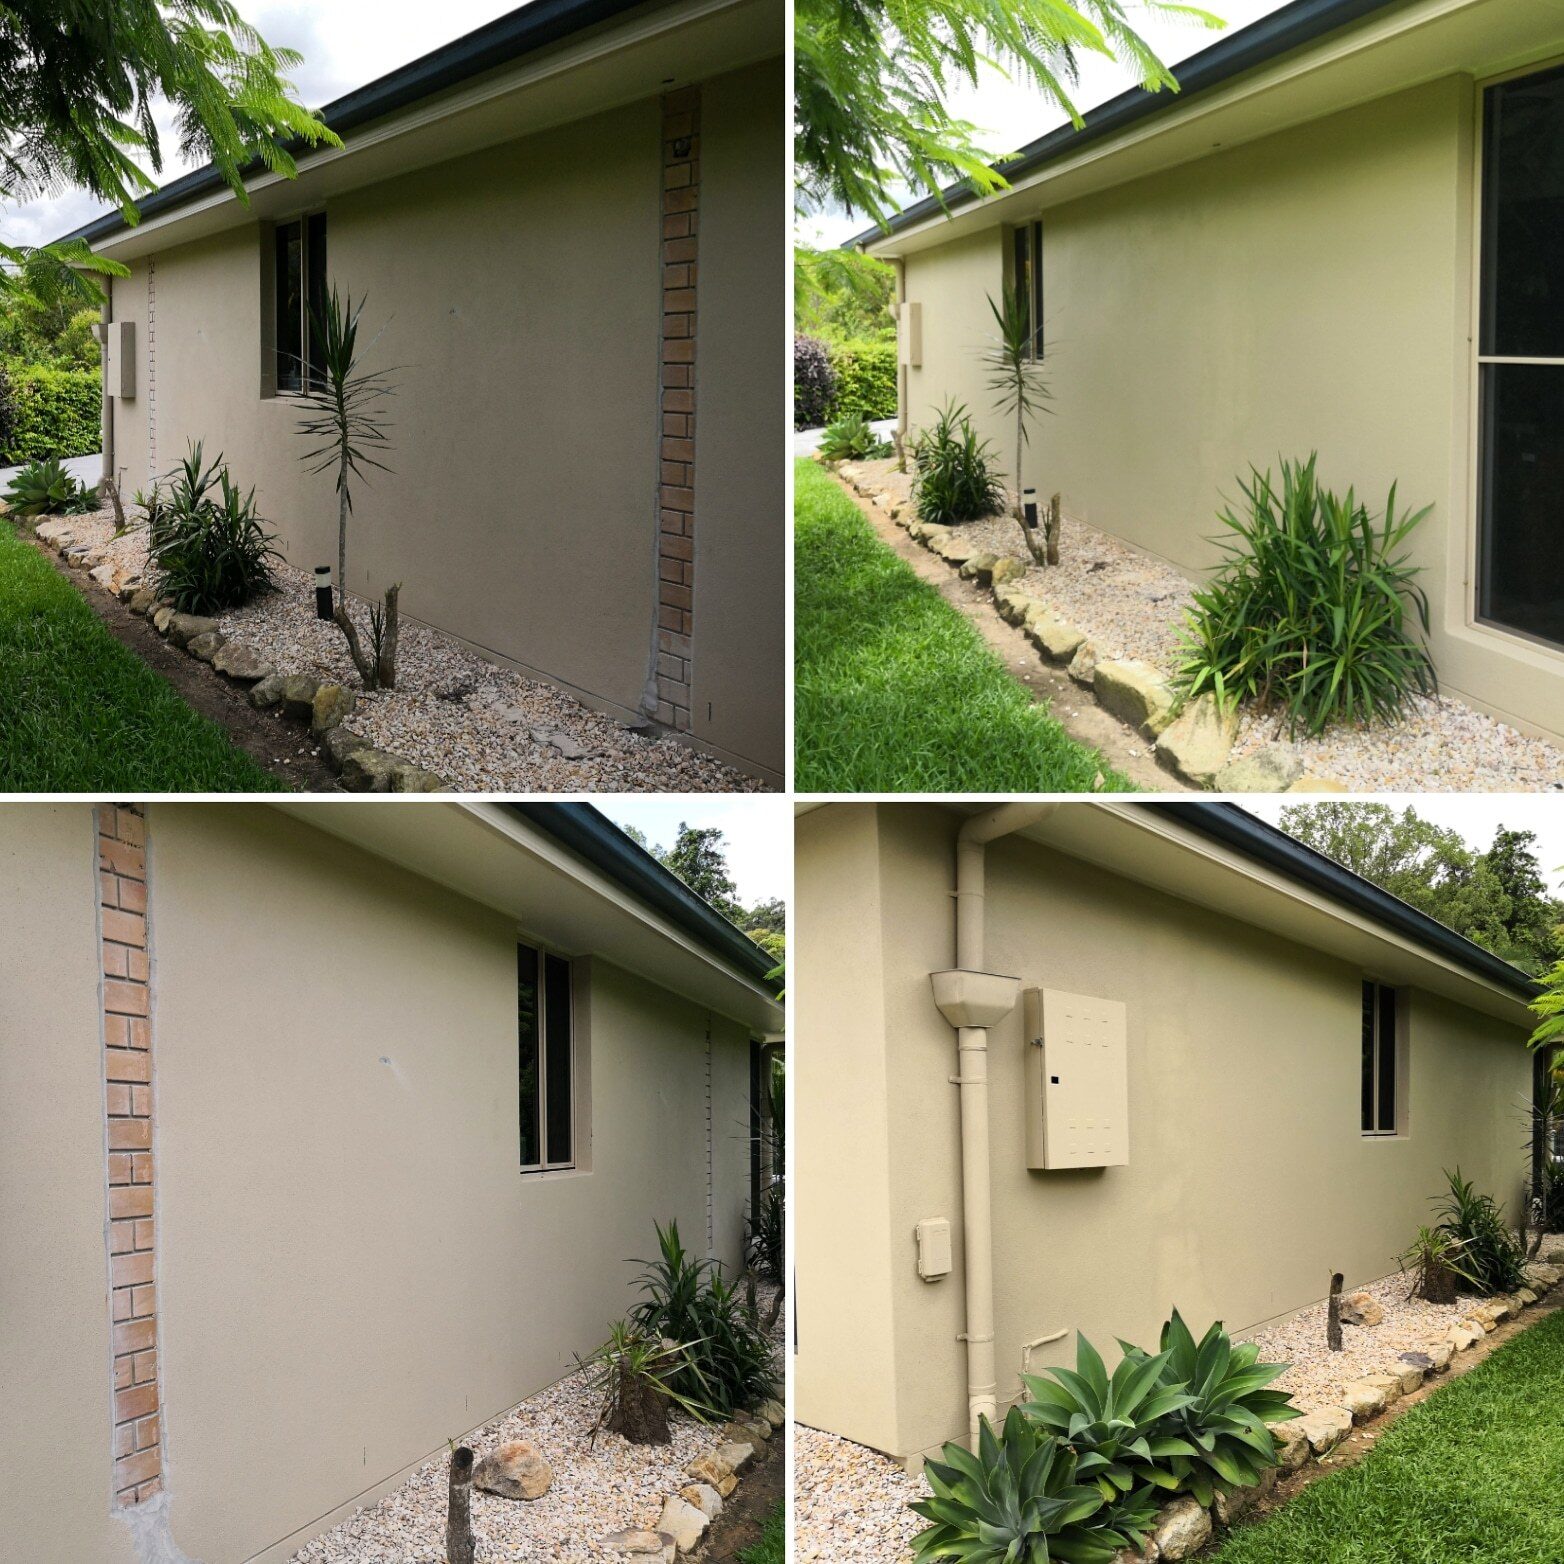
5. Make a patch invisible (the part most people get wrong)
If you’ve patched a small area and you’re painting just the patch, here’s how to make it disappear:
- Paint the patch itself with two coats.
- Once dry, “feather” the second coat outwards onto the existing paint — thinning the brush pressure as you go so the new paint blends to nothing about 30–50cm past the patch edge.
- Then paint the entire wall section between the nearest two natural breaks (corners, downpipes, window edges). The eye can’t pick the join if there’s a visual break framing the area.
If the existing paint is more than 5–6 years old, no amount of feathering will hide a patch — the existing paint has weathered to a different colour. In that case you need to repaint the whole elevation.
Painting just the patch is fine for a year. Painting between the natural breaks (corner-to-corner) is fine forever.
Tools we use
- Long-pile (12mm) microfibre rollers for textured render
- Medium-pile (10mm) for sand finish
- 4” brushes for cutting in
- An airless sprayer for whole-house repaints (back-rolled to push paint into the texture)
Need render painting on the Gold Coast? Call us on 0405 772 878 for a free quote.
About — Render Repair is the Gold Coast’s render & repaint specialist. 30+ years on the tools, QBCC #1192125. Honest quotes, fixed prices, finishes you can’t pick from the original wall.